Wednesday, January 31, 2007

Something old, something new...

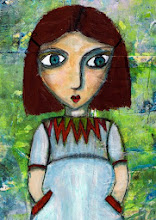
This lady has lain around in parts on my kitchen windowsill for quite some time. I eventually managed to fit the pieces together so that doll and box are combined. At some point I intend to create an artist's journal to fit in the box, but I'm glad to have come so far with this piece, after all the delays.

Talking of which... after several months of waiting, breath holding and hoping, I've just received a phone call to tell me that I can start my library project next week. I don't really want to complain, as I'm glad for the opportunity to do the work, but this last minute stuff is exactly the kind of thing I detest. Had everything gone as planned (the librarian said she'd contact me mid-month), I'd have had a couple of weeks time in which to get myself organized, get leftover commitments out of the way, arrange for other people to take on some tasks, and all that. But I guess we all know that many (if not most) people are not good at remembering and keeping commitments, sigh...

So, the project I've been waiting to launch is poised to happen. I have to document it for my records, and as the project is decidedly art focused, I've decided to do part of my documentation here on my blog.

A brief reminder: I'll be teaching book arts and creative writing in the local library as a six-month project. My special focus will be on introducing people to Altered Books. I intend to close the project phase with an exhibition of AB created by participants during the project. As far as I can ascertain, nothing like this has taken place in German before now, so it's pioneer work. Through the project I hope to create a job for myself, either as a city employee or through contacts I make during the project.

The project is more complex than that, of course, as are the hopes and intentions I have for it. One of the aims I have in mind is to help other unemployed artists (art teachers, talented amateurs...) in Germany by documenting the project and making my concept and the documentation available, so they can apply for funding to do similar projects in their own areas. Bureaucrats are always happy to know that someone has successfully gone before, so that's the role I've taken upon myself. I'm convinced this is an idea that can be replicated to create meaningful employment and make art more accessible and hands-on to the much-cited "average" person.


Here we go, then...

Saturday, January 27, 2007

Prayer Stick

I've always been fascinated by sacral (sacred) objects. I hold an view that now seems unpopular in the Christian west that objects and places can be hallowed (holy) and have a special connection to spirit, as an individual conceives it.

I'm convinced by experience (which is something different from believing) that objects and places can accrue a kind of spiritual energy. If you've ever entered a 1.000-year old church or spent time in an ancient monument, you may have experienced what I have in mind. And if you look at texts like the Book of Kells or some of the beautiful spiritual art of various cultures, you may have felt the links, too.

Among the objects that touch me most are prayer objects that people have made. Often the makers are not artists, but simply people with concerns and praise they wish to lay at the feet of Spirit. I strongly believe the act of creating is in itself powerful prayer, in addition to any words that may be added. The act of creation opens doors to deeply meditative states that make spiritual connections easier.

This is a simple payer stick I made recently. The stick is a wooden spatula that I covered in scraps of text from Bible pages someone sent me. I dabbed that over with a layer of acrylic glazes in red, yellow, and orange. The halo is made from two circles of (used) sandpaper glued back to back, with a scrap pf black and gold punchinella added between halo and face cabochon, which I touched up with some patina.

The stick is partially wrapped with lengths of twine I soaked in pigment overnight to age them. I had pigment ready mixed; you might prefer to use walnut ink or thinned acrylic paint instead.
Traditional prayer sticks often contain a "signature" to tell Spirit who made them, who has sent the prayer. In this case I included a tiny shell to represent the feminine and also the perfection in form and dimension and spiritual progression of the spiral.

The actual prayer is written on a long strip of rice paper. I folded the paper into a star (if I can find the instructions for the star, I'll share them), which then turned out to be too large for the stick. I unwrapped a few layers, tore them from the remaining star, then rolled them into beads which I attached to the fronds. I then attached the start to the stick.

I punched holes at the top and bottom of the stick. The top hole is for a hanging thread. (I have a special place where I hang things like this.) I attached a few threads and some hammered copper nails from an African necklace to the bottom of the stick.

Tuesday, January 23, 2007

Let's Get Cookin'

Art is nourishment for soul and senses, but from time to time, we must also nourish our bodies, but being artists... These are the spreads I did in Mika and Shakti's Gourmet Journals. Mika's recipe is for a deliciously creamy summer pudding that can be made either with dairy products or with soy and accompanied by any soft fruits available.

Shakti's recipe is also a dessert, but this one is really, truly soul food... What do you mean "what"? I mean chocolate, of course!

This versatile chocolate cake can be made with different kinds of added ingredients (and remember, the more and better the chocolate, the better it serves the needs of your soul). It doesn't take a lot of time and effort to make, there is no need to bake it, and it tastes wonderful. Yes, it's possible to make a cheapie version, but being chocolate gourmets, Shakti and I fully understand that the better the chocolate, the better it is for our souls. If economies are necessary, be sure to get your priorities right: halve the ingredients, make a smaller cake, and eat it alone!

Wednesday, January 17, 2007

Prompt Cards

Yesterday Maz' prompt card project arrived. The idea is to create a set of 104 art prompts, using both sides of a pack of (52) cards.

As it happened, I'd been picking through the freebie magazine I picked up at a supermarket and had some interesting images ready and waiting. Creating the cards was a quick and easy project. They'll probably be on their way to the next artist tomorrow!

Most of the cards are straightforward and rely on simple images. I thought twice about keeping the little boy for a project of my own, but... then it occurred to me that I could go back to the supermarket and pick up another copy of the mag.

This is a wonderful project idea. I can see it working well for artists of all levels of experience and in various types of setting.

Tuesday, January 16, 2007

Angels and Demons

This is a spread I did in Claire's "Angels and Demons" journal. Needless to say (I hope), we were not dealing with the forked tails and wings type of entities. There isn't a lot I want to express about my entry, except that I found it as (surprisingly) difficult as others did, and that we seem, for the most part, to be part of a community of like souls, in many respects.

Friday, January 05, 2007

Prayer Box #1, 2007

This is another of my Prayer Boxes. I find I'm making them more and more often with specific people in mind rather than "just because".

Again, I used an oversized matchbox (11 x 6,5 x 2 cm) to work on. The first layer on the sleeve was watercolour crayon (reds and yellows) blended using a baby wipe. The second layer is tissue with a swirl pattern. Someone in one or other of the groups I'm in uses this tissue to wrap art, and it's one of my favorite art and collage materials! Talk about kids playing with the packaging rather than the toys...

For the next layer, I tore strips of handmade burgundy mulberry paper, which looks rather regal. Earlier on I'd pulled three pieces of colored glass from my stash: one burgundy, one clear light orange, and one in an opaque Naples yellow. They matched the colors of the paint and paper very closely. The idea I had in mind was to show progression and transition, the movement of communication between the worlds, and also to show the absolute (solid) and the shifting, relative (gradients and patterns) of the worlds.


I painted the inside and outside of the drawer for unity, then collaged scraps of the same papers used on the outside, plus a scrap of bodhi leaf, onto the inside. The box contains a tag booklet stamped with an alphabet stamp, to symbolise "the word".

I finished the box by punching holes along one edge of the sleeve and stringing through a spiral of red wire onto which I threaded beads as I went along.

Wednesday, January 03, 2007

Tag Booklet Tutorial

Decorate the tags: First, do something arty to the tags, so you have a background for later. I colored mine (yesterday) using watercolour crayons and baby wipes then stamped on them. I simply dabbed an ink pad onto the tags in the example. Work on one side of each tag completely, then turn them over and do something at the top of the tag around the hole.

Fold the tags: Lay the tags on your workbench with the holes at the top (short edges at the top and bottom). Fold each tag so that the bottom edge touches the bottom of the ring (hole) reinforcement. In other words, do not fold the tag perfectly in half; fold it so you have a narrow tab.

Create the booklet: Open the tags out again, and lay them face down (undecorated sides up) on your workbench. Spread glue on the smaller flap of the (undecorated) back of the first tag. Stick it to the larger flap of the (undecorated) back of the second tag. Repeat until you have only one tag left.

Make the cover: The final tag will become the cover of your booklet and will cover the spine folds of the other tags. As you work, you'll see that you have to glue the final tag on to what was your first tag. Glue the small flap of the first tag to the large flap of the final (cover) tag.


Cover the spine: Judge how much tag you'll need to cover the folds, then score a fold. Stick a strip of double sided sticky tape onto the tag where it will cover the spine folds. The sticky tape provides better adhesion than glue here. Spread glue on the remaining part of the cover tag and stick it down to form a booklet. Apply pressure to the spine to make the tape stick as firmly as possible to the folds.


Embellish: All that remains is to embellish the journal as desired. As well as a writing/visual journal, this would easily make a nice little friendship booklet or phone list. It's also a suitable format for decos. If you cut your own tags, you can scale up or down as desired.

Tuesday, January 02, 2007

Tag Book

Happy New Year! I hope 2007 will be a year you can enjoy: a year in which you find the inspiration, willpower, and energy to create a life you find productive and satisfying on all counts, especially in connection with your art.

I spent yesterday playing with ideas for my upcoming library project. I'll write more about that in late January or early February. Anyway... one of my arty friends, Gena, was home in the USA in December, and while she was there she picked up a box of 500 shipping tags at an office supply store. Most European-based paper artists will know how delighted I was at this news, especially as the box wasn't all that expensive. (Artists from the USA might need to know that craft/scrapbooking supplies in most of Europe are nothing like as good or as easily available as in the USA. I can't even get simple things like shipping tags in Germany.) PayPal and email are great for things like this: Gena emails to tell me what she's found and to ask if I can use it, and I PayPal the necessary cash to pay for it.

So there I was yesterday afternoon, trying to come up with one or two "success guaranteed" ideas for first-timers that also don't make a lot of mess or need a great deal of clean-up materials/facilities. This tag booklet is a prototype of one of the ideas. I used eight tags here, and I think this model would work nicely with anything between three and thirty tags (think phone list to mini journal).


I'll post a picture tutorial tomorrow.