Sunday, March 30, 2008

Altered Tin

Last week, Marilyn Wells signed up for Art In A Carton. At the same time, she invited me to take part in an altered tin swap on a spring theme. I decided that, as I was sending her mail in any case, I might just as well take part and include my tin. (I rarely take part in US based-swaps these days, as the intercontinental postage is too expensive.)

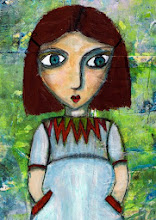
This is the front of my tin. I won't show the other views, as I've built in a little surprise that I don't want to spoil by writing about it here.


Marilyn's Blog
http://unshelvedwords08.blogspot.com/

A Round Tuit

How often have you heard yourself saying, "I'll do it when I get around to it"? Well... this is a round tuit I made for someone, who, as it happens, has no need of one whatsoever.

Using an old CD-ROM as the template, I cut a circle of wire gauze the same size as the CD-ROM. You can cut wire gauze with scissors, easy as pie. Using the gauze circle as my "fabric", I sewed on objects like beads, buttons, tiny shells, and bits of metal junk, including a ring pull and electronic resistors. I filled in the gaps with knotted eyelash yard.

I then drilled four holes in the CD-ROM and attached the gauze using cheap brass brads from the stationery store. The outcome looked good, but that little something was still missing. I thought it needed a little more bling, so I put together a corona made of glued together clothes peg sections and painted it with various metallics. When it was dry, I stuck the tuit onto the corona and... bling!

Monday, March 24, 2008

Leaf Journals

The style of these journals is borrowed from the palm leaf journals found in Asia. There, sheets of paper (papyrus) made from palm leaves are bound on a thong between wooden covers. Most of the palm leaf books I've seen or heard of contain sacred texts. These journals contain blank pages, so the recipients can use them to write and store their own secret or sacred content.

For the covers, I started out by cutting two pieces of balsa wood. Anything between 2-4 mm thickness will be fine. You can also use sturdy cardboard or bookbinder's board. These particular covers are 5x15cm (ratio 1:3), to fit in the cartons I'm using for the Art In A Carton project. For my own use, I prefer 5x20cm (ratio 1:4). I drilled two holes in each cover before painting and so on. By drilling the holes at the start of the process, you can save yourself the trouble of having to go back and touch up the holes so the wood doesn't show. Simply paint inside the holes as you go.

I base coated the covers using Pelikan Prism, a two-tone acrylic paint that contains gold pigment. Two books are done in pink/gold and one in blue/gold. I then used a hot glue gun to dribble threads of glue onto the covers. Once cooled, I rubbed alcohol inks in to the threads. After a couple of minutes drying time, I went over parts of the covers with light coats of Lumiere metallics. After the covers were completely dry again, I dabbed on just a hint of glitter glue and a dusting of micro pearls.

Each journal contains around 10 pages. Just cut card stock to size and use the holes in the covers as a guide to mark out where the holes need to be in the card stock. Punch the holes with an eyelet tool, or whatever you have for the job.

Cut 2 lengths of narrow ribbon for each book. (I used 3 mm ribbon, because that's what I had. You might prefer to use twine or leather thongs or, or, or...) Each length or ribbon measures around one metre.

Thread each length of ribbon through one set of holes. Tie a bead or a button at the end of each length or ribbon, to prevent it slipping out of the holes. Repeat for the other set of holes.

Easter Basket

Remember the word stones from a few weeks back? This is a little Easter basket -- well, a small one-serving can -- that I made for a friend. The "eggs" are a set of word stones.

Saturday, March 22, 2008

Maxi Matchboxes

These is one of two large matchboxes I made yesterday for Art In A Carton. Again, one is posted here and the other on the Art In A Carton blog.

http://art-in-a-carton.blogspot.com/

Both are decorated with paper and ribbons, wire and buttons. I had quite a few "voyage" images, so the boxes have a loose voyage theme. Each box contains little topic-related surprises for the recipients to use in their own art.


Collector's Chest

This is one of two chests of drawers I finished off today for inclusion in the cartons I'll be sending out on Tuesday. You can see one here, and the other is posted on the Art In A Carton blog.

http://art-in-a-carton.blogspot.com/

It's sometimes challenging to thing up projects that will slot into a carton and still be substantial, but these matchbox chests fit the bill and are fun to make.

Each of the drawers is filled with little surprises the recipients can use in their own art.

Sunday, March 16, 2008

Easter Cards

Third and last post for today: I finally completed my Easter cards. I have a few relatives who would be piqued if I didn't send cards.

I made three kinds. Easy peasy and fast to make, if fiddly. The only drag is that the Post Office charges double the normal rate for postage, as the cards are in a non-approved (square) format.

ATC Journals

I've had a pile of glassine envelopes lying around here for a long time, and as I'm trying to art off my stash, I wanted to do something with them.

The outcome so far are these journals, one with twelve envelopes, the other with eight. The envelopes are just the right size to contain an ATC, with a little space to spare.

I'm going to propose an little swap / round robin to the Alkymia group. I'll place an ATC in each envelope, and each participant can select an ATC to keep and replace it with one for me.

Dancing Spirit Doll

Materials for the dancing spirit doll were included with a zine Gena made for a swap in the Travel Journals group. I'll photograph the zines I received as soon as I can. (The batteries in my camera are empty, and I had to give them a quick blast in order to finish processing and transferring this photo to my computer.)

I spent yesterday evening making the doll, and here she is.

Sunday, March 02, 2008

Easter Goodie Drums

This has been one of those weekends when I feel I've been slogging away all the time -- or waiting for something to dry, so I can take the next step -- but with nothing much to show for it.

These are some "pretties" I made as containers for my granddaughters' Easter goodies. I still have one to make for my grandson. These are all very girlie, though.

The containers are cardboard tobacco drums with plastic lids. My neigbour saves them for me, and I knew they would come in handy at some point. After a thorough dusting out, I painted the outside of each drum with gesso, to cover up the tobacco label. In a next step, I painted over the gesso using either yellow or pink acrylic. When the first layer was dry, I went over it again with two or three washes of yellow (or pink) eggshell glaze (a glaze that contains tiny white flakes) to add dimension.

Then I wet and tore raggedy strips of a coordinating mulberry paper and decoupaged them onto each tin and added a strip of matching polka dot ribbon.

The lids have a rim, so I cut patterned cardstock circles to fit inside the rim. I do this using a circle cutter. It's a cheap little tool I picked up at a craft store a long time ago; like a compass, but with a blade instead of a pencil lead. I think you can get them in stationery stores, too. I can tell you, I wouldn't want to be without mine.

I decided to decorate the lids with punched flowers. First I punched out a scalloped circle as a contrast, so the flowers would stand out against the cardstock pattern. I then glued the circles together and punched a hole in the center (see the next step for the reason).

Then I used two flower punches to cut petals from the same cardstock I used for the larger circle. The cardstock was printed on both sides, so I automatically had matching patterns. I punched out three large flowers and two small ones for each lid and used a hand hole punch to make a hole for the brad to hold them together. (I like to add a dot of glue stick to the centres and then arrange the petals, so they all show.) I also punched a hole through a twist of the same polka dot ribbon I used on the drum, then simply poked the brad through all layers, including the large circle(s), and stuck a foam strip to the back. The center of each plastic lid is deeper in the center than at the rim, so the foam strip fills the gap.

To stick the topper to the lid I used acrylic gel medium and pressed the cardstock down firmly using a paper towel to remove little oozes neatly and cleanly.

I made a second flower for each container and stuck it over the ribbon join using a foam strip.
The nice thing about the flowers is that you can flip a knife blade or credit card under them and raise the layers of petals, to add more dimension.

You could easily add more embellishment to the drums, if you were to make them for adults, but I decided this was enough for the children. I know they will love the drums to bits, but being children, they will handle and use them, deciding they were pretty enough for the handling they will receive.