Sunday, October 28, 2007

The Divine Feminine 2

Here are three more of the arches I made for the "DivineFeminine" swap.

The background for the image on the left is part of a strip collage. I took paper remnants and cut them into wedge shaped strips that I then glued onto a background sheet. The entire sheet was then painted green, to pull the scraps together and make them homogenous. Here, I stamped leaves and blooms onto the collage background and embossed them with clear embossing powder before applying the images. I made the wire embellishment in the peak using a pegboard.

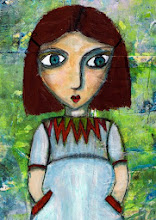
The little girl looked divine to me. She is probably around eight or nine, which is a magical age: they have such confidence in the life ahead of them and still believe they can do and be anything. I imagined her writing her life in the book, and I added the wings so that she would always know she could fly, whatever....


This card contrasts with the girl card. Here, the divine woman is a young adult, crowned, but embedded in a life from which she looks out into the world.


Wednesday, October 24, 2007

The Divine Feminine

These are some arches I've made for a swap on the theme of "The Divine Feminine" for the Travelling Journals group. I have several more arches in production, and I'll upload the photos as I complete them.

Most of the arches I've been producing in response to this idea have some texture to them. As well as scraps of fabric or ribbon, I've used wire, micro beads, gesso, and random threads of glue from a hot glue gun. The glue gun texture makes interesting backgrounds, but as the threads of glue are fairly raised, it can be difficult to work on top. Once I have the feeling I've completed enough arches, I'll finish them off by adding fibres and beading, too.

Saturday, October 20, 2007

Dimensional Paper

This is a variation on a technique I learned from Shakti a couple of years back. You'll find the link to Shakti's blog in the list on the right. The result is a highly dimensional paper that you could use to cover an altered book, for example.

Start with a sheet of black construction paper -- sometimes known as sugar paper. Crumple the paper well, then flatten it out an little and glue it to the center of a background sheet, preserving the folds by pushing and scrunching the paper together as you glue.

When the paper is dry, set up a palette with three shades of one color. I used bronze, copper, and gold acrylic paint. Using a dry brush, dab into the darkest shade and begin whisking the brush in one direction (for example, left to right) across the ridges to pick out the contours. When you've done that, turn the paper a quarter turn, then take the second color and repeat the dry brush whisking process, using the same direction you used the first time. In my case that would be left to right again. This highlights the same ridges you highlighted the first time from a different angle, and it also helps make more ridges visible. Repeat the process, turning the paper a further quarter turn and using the third color. Again, some ridges will be highlighted from yet another angle, and more new ridges will appear, because your brush will pass over more surfaces.

The paper and paint I used left me with a piece that looks like folded metal. Other colors of paper and paint will produce other effects.When the paint was dry, I cut off the protruding background paper, so I was left only with the dimensional paper.You can use the sheets as they are, or you might cut them into strips and squares and create a pattern by turning some of them.

If I get around to making another sheet today, I'll post a pattern example tomorrow or Monday.

Thursday, October 18, 2007

Tinnie RAK

After seeing tinnies on Lisa Kaus' website, I wanted to try making one myself. I immediately ran into a problem in that I don't use tinned food often, so I had to go begging for an empty tin can (the ring pull kind, as they don't have sharp rims).

I made this tinnie with an aquaintance, Angelika, in mind, so it's decorated to her taste rather than mine. I really enjoyed the process, though.


I sanded and gessoed the tin, then painted it with acrylics in sand and pink. Then I cut scalloped strips of print and topped them with colourful paper, ribbons, punched hearts, and fun foam flowers.

After punching two holes near the top of the tin, I strung through a length of wire and threaded on painted wooden beads and a paper bead before adding bows. I glued four more painted beads to the bottom of the can with a hot glue gun. As a final touch, I cut some tags to pop into the tin.
I have a hunch Angelika will like her tinnie. It's also the kind of idea she can take further and use in her work as a kindergarten teacher.

I'll definitely be making more of these when I can lay hands on more suitable tins.

Monday, October 08, 2007

CPS Birthday RAK

Cloth Paper Studio (CPS) is one of the "artsy" online groups to which I subscribe. Each month the moderators post a list of birthdays, so members have the opportunity to send RAK to the birthday girls. This month I noted that three other women have birthdays on the same day as mine, so I decided to make a little something for each of them. These are the first two gifts; the third is in the making.

As with the booklets I posted a day or two back, these are fairly simple, so the recipients can add to them as they please.

I'll pop them in the post in the next day or two, even though they don't have to arrive until late in the month. Mail from Europe to the USA can take time, so the earlier the better.
Making these items was a wonderful way to use up my scrap paper collage sheets.

Cloth Paper Studio

Saturday, October 06, 2007

Eight Wishes RAK

This is a folded tag journal I made for a woman I met (in face to face life) a couple of weeks ago. There are eight pockets, each with a tag. I deliberately kept the style, format, and materials simple, because I wanted to make something she can easily reproduce using basic techniques and supplies. (I guess you all know my ongoing groans about the lack of interesting materials where I live, by now.)

The general idea is to enable constructive art and journaling in small steps, even at a time when little seems possible. One side of each tag is decorated, the other is blank and can be used to write a short journal entry. In this particular case, I'm going to suggest writing about wishes for areas of her life, for example: self, others/friends, relationship/lover, vocation/calling, earning/work, home, higher things, and future.


The pocket backgrounds are partly blank, so she can add her own art and embellishments. The different sizes of tag are a way of prioritising, and are completely replaceable at any time.

Monday, October 01, 2007

Four Arches

These are the remaining arches for the Travelling Journals group swap. Now I've completed these, I shall be making more for myself, so I can create a nice, full book when the time comes.

The image of the bird (of all the birds I've use in these particular cards) is from an old nature book (published in 1887) I picked up recently. Overall, the book was in poor condition, but I was able to salvage parts of the covers, the endpapers, and the color plates to use in my work. The images are simply gorgeous, and the paper on which they are printed has a texture that adds depth to the images.

The dead bird is one of my favorite pictures. Though the bird might have died during any season, in theory, the withered leaves seem to suggest autumn, and through that they emphasise the impression of endings and approaching decay.

The girl and the (I think) crow seem to be waiting at the veil, each on their own side. The girl is lost in thought, possibly sorrow, and the hands in her lap suggest patience to me. She accepts the inevitability of her loss, but she also appears at the veil and waits for the promised brief touching at the appointed time.

Two angels stand at the portal of the death realm. The door is set against a starry sky,whichto me suggests that the door is also an entryway into eternity. Above the door is a Celtic rose or cross with four directions and a mid-point, and, like many Celtic images contains single, eternally circling lines.