Sunday, September 30, 2007
A House For Her Dreams
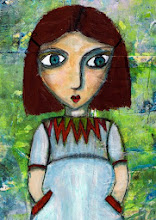
As you can see, this is a case of "and now for something completely different", in contrast to the rest of my work.
Earlier this year, I was overjoyed to find these little birdhouses in the euro (dollar) store. I picked up six, and now I'm just getting around to working with them. To do that I started by pulling off all the tacky deco and painting the equally somewhat strange background colors over with gesso, to create blank walls.
This weekend I wanted to make a house for a friend, Nati, as part of her birthday gift, so I pulled out her favorite colors (blues) and started off. I've been trying out some ideas based on the work of Lisa Kaus (link below). I reasoned that Lisa's "crafty" style is something Nati will like much more than my usual approaches and colors, so I chose to work on her house in that way.
I used a pencil to mark out grids on each of the surfaces. The lines remain visible n the finished product, but that only adds to the appeal. My next step was to color the spaces in the grids using water soluble pencils in shades of blue, lilac, and french grey. Then I spread and blurred the color with a paintbrush and water. Once the paint was dry, I drew spirals and dots in the squares, using the same color as the (now lighter) base layer in each case. After that I collaged scraps of printed paper and corrugated card onto some squares and went over the grid lines to bring them out more clearly.
I used buttons, tiny seashells, netting, rub-on transfers, and word stickers as embellishments on the outside. Then I thought it might be nice to raise the house off its flat base, so I painted four half circles and glued them to the underside.
To finish off, I punched around thirty little tags for Nati's hopes, wishes, and dreams, tied various blue yarns to them, and popped them inside the birdhouse. The gift tag, translated, reads "a house for your dreams", and has blue glass beads and shells threaded onto the tie.
Lisa Kaus
http://www.lisakaus.com/
Saturday, September 29, 2007
Three Gothic Arches
Just to make you drool.... I'm sitting here listening to the new James Blunt album and scoffing Lindt mini pralines (but only one of those little tins with six in them).
These are first three of the gothic arches I've made for the Travelling Journals "Thirteenth Month" swap. I cut the arches from sturdy card stock then painted one side of each arch with gesso. The next step was to paint the backgrounds and then stamp some of them, too.
In the gargoyle arch, I used a diamond background stamp and part of a skeleton leaf I found last year, then I glued on the main image and added part of an line drawing of a bare branch.The lady image is painted and stamped and incorporates a transparency and some painted netting.
The magpie arch is painted and edged with scraps of print and what I believe is called "German scrap". (It seems to be called that everywhere except in Germany.). I colored the edging with watercolour pencils. The image also incorporates a scrap of wallpaper and a little fabric braid.
Magpies are said to be messenger birds of the faeries, and once a year they can carry the souls of the dead to the edge of the world, where the veil is thin and lovers parted by death can almost touch. This, of course, takes place during the thirteenth month.All the cards are edged with a scraping of bronze acrylic paint.
Sunday, September 23, 2007
Collage Postcard
This is one of the collage postcards from a series I've been working on in connection with an imagined journey. The ship is from a flyer for an exhibition about the "Titanic", which took place in Kiel this summer. The map fragment is from a newspaper search game. Both items go to show that material is everywhere, even though German advertising material is traditionally boring to the extreme. I'll admit I can get a little envious when my US-based art friends enthuse about AOL CD tins, fake credit cards and the like! Other items used include scraps of patterned papers and lacy cellulose paper.
Wednesday, September 19, 2007
Blessing Doll
I've been challenging myself to use up as many little scraps and images as possible, recently. Making collage paper is one good way of doing that; creating ATC and decorating paper dolls are others. Here is one of the "blessing dolls" I made last weekend. It's relatively simple, as I was away from home and had only my travelling box of supplies with me, so I had no way to add stamping, beading, or sewing. Even so, I enjoy the pleasure of knowing it is possible to create even if we have only limited resources.
Thursday, September 13, 2007
Puzzle Pieces
A year or two back, it seemed that everyone was crazy about altering children's puzzle pieces. Somehow I never got around to them. Recently I found a handful of pieces in my "jumbled materials" box and gave it a whirl. Despite my initial skepsis, I found altering the puzzle parts was a nice play-around for lazy afternoons, and a wonderful way to make good use of scraps too small for much else.
Tuesday, September 11, 2007
Reliquiaries
On a recent expedition into the deep lands of Imagi-nation, I excavated these artifacts, which were identified by an expert as muse devotionals. Each of the reliquaries contains a much sought-after sacred bone from the hand of an ancient muse. Legend has it that an artist who possesses one of these bones will transcend all creative barriers and rise to express her artistic potential to the full.
The first (above left) is mine, of course, but the one with the golden crown (right) is waiting to find its true home. If you think that home should be with you, let me know. The object is approx. 20cm (8 in.) high, including the flame crown, and around 10 cm (4 in.) wide). You can contact me via the email address link in my profile (below on the right). I'll be happy to exchange for art or materials.
Monday, September 10, 2007
Summer and Winter
I completed the remaining paper dolls for the seasons swap. All that remains is to make a doll that represents me. I'll do that next week.
The red doll is "summer", and the cream/blue is "winter". It occurred to me that they could easily have been switched, particularly as the winter doll contains shore and water elements. On reflection, I think I made the winter doll as I did because I love clarity of the seashore in winter. The red and glitter of the summer doll represent the heat and flamboyance I see in some types of summer. Of course, another explanation might be that summer and winter have been highly confusable here this year. We had summer for a couple of weeks in April, and it has rained a lot over the traditional summer months, with only occasional -- and generally unpredicted -- fine days here and there.
The centre panel of the summer doll is embroidered and also features glass beads and mirrors. The winter doll is beaded, too, and she also features an ancient and highly traditional form of embellishment: fishbone. (My neighbour caught me a carp recently, and I thought the larger bones too interesting to toss away, so I dried them, with a view to including them in one or two art projects.)
I'll be putting the ladies in the post to France tomorrow, so here they are together for the last time.
Tuesday, September 04, 2007
Seasons
I'm participating in a paper doll swap this month, along with three other artists. The hostess has chosen "four seasons" as the theme. I'd already begun work on my first doll (typical me...) when the instructions were extended to ask us to include arms; that'S why I have two "spring" dolls on view here. I'll complete the set without arms for my own collection, while the dolls with arms will be sent for the swap.
The green doll is "spring", and the cream/brown doll is "autumn". Each of the dolls is cut from two pieces of my own collage paper, one full doll size, and the other slightly smaller in the body section. (I make the collage paper from scraps stuck on light card then washed with an acrylic glaze to pull them together visually.) The "hair" (florist's teasel grass) is sandwiched between the head sections of the layers.
Subscribe to:
Posts (Atom)